Want great custom shirts? Worried about the heat press process? It's simpler than you think with the right guidance.
Using a heat press involves setting the correct temperature and time for your transfer and fabric. Position the shirt, place the transfer, apply pressure, and then peel. This creates durable, professional-looking custom shirts.
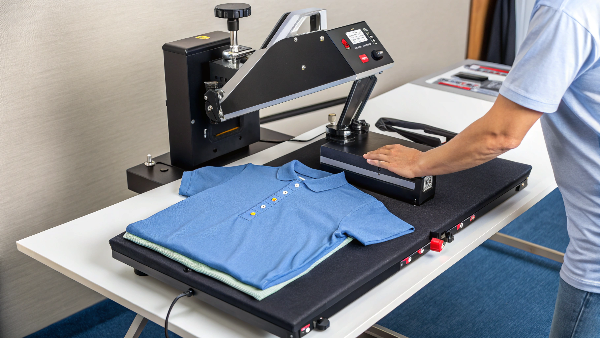
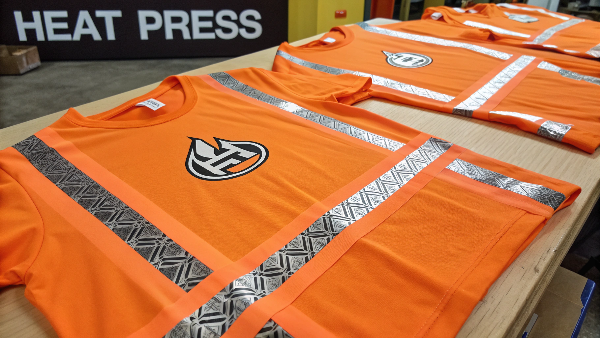
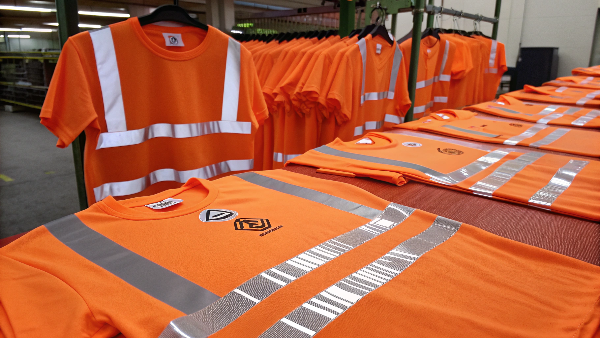
Using a heat press for the first time can feel a bit daunting. I remember when we first started using them extensively at Vissafety for applying our reflective tapes and logos; precision was key. But once you understand the basics, it becomes a straightforward process. Let's walk through everything you need to know to get fantastic results, just like we aim for with every high-visibility garment we produce. You'll be pressing like a pro in no time.
How do you heat press a shirt step by step?
Need a clear, easy guide for heat press1ing? Feeling lost with so many instructions? I'll show you my proven method.
First, prepare your heat press, shirt, and design. Pre-press the shirt to remove moisture. Position your design carefully. Then, press according to instructions. Finally, peel off the carrier sheet.
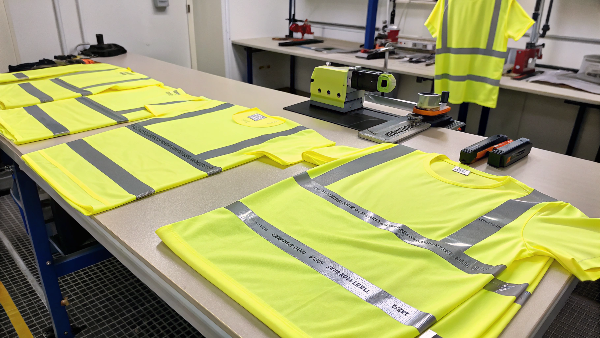
Getting a perfect heat press application, especially for items like our Vissafety reflective tapes that need to be super durable, comes down to following the steps carefully. I've learned this through years of experience ensuring our safety wear meets the highest standards.
Preparation is Key
Before you even think about pressing, get everything ready.
- Turn on your heat press: Set it to the recommended temperature and time for your specific heat transfer material (like HTV or a sublimation print) and your shirt's fabric. I always double-check the material specs.
- Prepare your shirt: Lay it flat on the press. If it's new, a quick pre-press for 3-5 seconds removes wrinkles and moisture. This is a small step but makes a big difference for adhesion.
- Prepare your design: If you're using HTV, make sure it's weeded correctly. Have it ready to place.
The Pressing Process
This is where the magic happens.
- Position the design: Carefully place your transfer onto the shirt. For logos or chest prints, I use a T-shirt guide or measure to ensure consistent placement.
- Cover it: Always use a Teflon sheet2 or parchment paper over your design. This protects your shirt from scorching and your heat platen from any residue.
- Press: Close the heat press and apply the recommended pressure. The machine will count down the time.
Post-Pressing Care
What you do after is also important.
- Peel: Once the timer goes off, open the press. Check if your transfer material is a hot, warm, or cold peel. This is crucial! Peeling at the wrong time can ruin the design. For many of our Vissafety applications, we follow specific peel instructions to ensure the tapes bond perfectly.
- Cure (optional): Some transfers benefit from a quick post-press for a few seconds (covered again) to really set the design.
Following these steps ensures your designs are not just good-looking but also last through wear and wash, which is vital for us.
What do you need to heat press shirts?
Starting with heat pressing but unsure what gear you need? Don't want to overspend on tools? Here’s what you’ll actually use.
You'll need a heat press machine3, the shirt itself, your heat transfer design (vinyl, sublimation paper, etc.), and a protective sheet4 like Teflon or parchment paper. Sometimes, a heat-resistant pillow helps.
When we set up a new heat pressing station at Vissafety, or advise our clients, we focus on the essentials that guarantee quality. You don't need a lot, but the right tools are important.
The Heat Press Machine Itself
This is your main investment.
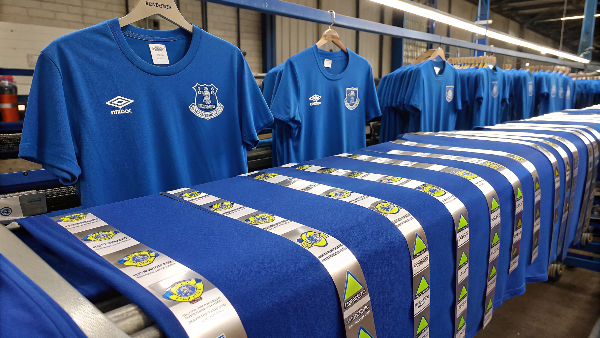
- Types: The most common are clamshell (opens like a clam) and swing-away (the top platen swings to the side). Clamshells are space-saving, while swing-aways offer better access to lay out your shirt. We use a mix depending on the task. For large, precise applications on our safety vests, a swing-away can be easier.
- Size: A 15"x15" press is very versatile for T-shirts. Consider what you'll be pressing most often.
- Quality: A press with even heat and pressure distribution is key. Inconsistent heat can lead to parts of a design, like our reflective logos, not adhering properly.
Transfer Materials
This is your actual design.
- Heat Transfer Vinyl (HTV): Comes in rolls or sheets, many colors and finishes.
- Sublimation Prints: For polyester fabrics, the ink turns into a gas and dyes the fabric.
- Screen Printed Transfers: Plastisol ink printed onto release paper.
- DTF (Direct to Film) Transfers: A newer technology that's very versatile.
Protective Accessories
These are non-negotiable for me.
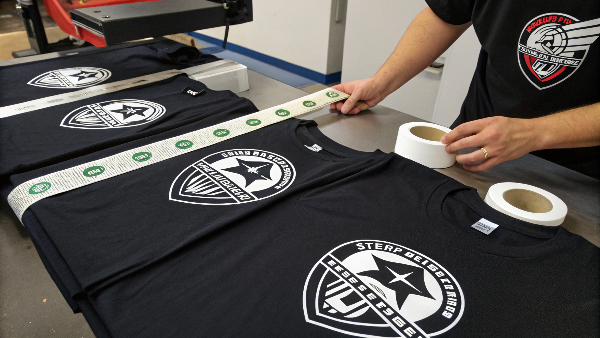
- Teflon Sheet or Parchment Paper: Placed between your design and the heat platen. It prevents ink or adhesive from sticking to the platen and protects the garment from direct, harsh heat. We go through a lot of Teflon sheets!
- Heat Press Pillows/Pads: These are foam-filled, heat-resistant pillows. You place them inside or under the shirt to help distribute pressure evenly around seams, zippers, or buttons. This is very useful for our Vissafety jackets that have zippers and pockets.
Optional but Helpful Tools
- Weeding Tools: For HTV, you'll need a tool to remove the excess vinyl.
- Heat-Resistant Tape: To hold your design in place, especially useful for sublimation.
- T-Shirt Alignment Tool/Ruler: Helps with consistent placement.
Having these items ensures you can handle most T-shirt pressing jobs effectively.
How long do you leave heat press on a shirt?
Confused about the right press time? Worried you'll press too long or not enough? Timing depends on your materials.
Pressing time usually ranges from 10-20 seconds for most Heat Transfer Vinyl (HTV)5. Sublimation takes longer, around 45-60 seconds. Always refer to your specific transfer material's instructions for the exact time.
Getting the press time6 right is critical. At Vissafety, when we're applying heat-activated reflective tapes or complex logos, the duration of the press directly impacts adhesion and durability. Too short, and it might peel; too long, and you risk damaging the material or the garment.
Factors Influencing Press Time
Several things determine how long you should press:
- Type of Transfer Material: Standard HTV usually needs less time than specialty vinyls like glitter or flock. Sublimation requires significantly longer as the ink needs to gasify and bond with the fibers. Screen printed transfers are often very quick.
- Fabric Type: Cottons can generally handle more heat and time than delicate polyesters or blends. For our polyester safety vests, we are very precise with time to avoid shine or melting.
- Manufacturer's Instructions: This is your most important guide. Different brands and types of transfers will have specific recommended times. I always tell my team: "Check the spec sheet first!"
General Guidelines for Common Materials
While you should always check specific instructions, here's a rough idea:
| Transfer Type | Common Time Range | Notes |
|---|---|---|
| Standard HTV | 10-15 seconds | Check if hot, warm, or cold peel |
| Glitter/Specialty HTV | 15-20 seconds | Often requires more pressure too |
| Flock HTV | 15-20 seconds | Creates a suede-like texture |
| Sublimation | 45-60+ seconds | Temperature is also higher, usually on 100% polyester |
| Screen Print Transfer | 7-12 seconds | Usually hot peel, check instructions |
The Importance of Testing
If you're using a new material or pressing on a new type of garment, always do a test press on a scrap piece or an inconspicuous area. This small step can save you from ruining an entire batch. We learned this the hard way in the early days. Now, testing is standard procedure before any production run, especially for our certified safety products where performance is paramount. It's vital to make sure our heat-applied tapes are strong enough and won’t fall off after washing.
What temperature do I set my heat press for t-shirts?
Not sure what temperature to use for your heat press? Afraid of burning your shirts or getting poor results? Temperature is crucial and varies by material.
For T-shirts, heat press temperature often ranges from 300-320°F (150-160°C) for HTV. Sublimation needs higher, around 380-400°F (195-205°C). Always check your transfer material's specific guidelines.
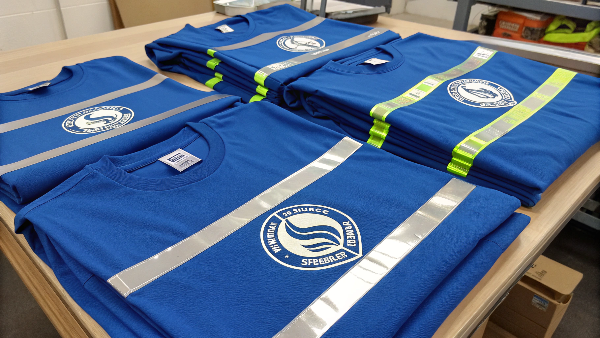
Setting the correct temperature on your heat press is just as important as setting the right time. At Vissafety, we calibrate our machines regularly because precise temperature control is essential for the quality and durability of the reflective tapes and logos we apply. If the temperature is off, the adhesion can fail.
Why Temperature Matters
- Too Low: If the temperature is too low, the adhesive on your transfer material (like HTV) won't activate properly. This means your design might not stick well, or it could start peeling off after just one wash. This is a big concern for us, as our safety wear needs to be robust.
- Too High: If the temperature is too high, you risk several problems. You could scorch the fabric of the T-shirt, especially on lighter colors or delicate materials like polyester. The transfer material itself can melt, warp, or become discolored. For some HTV, excessive heat can cause the adhesive to ooze out from the edges.
Temperature Guide for Different Transfers and Fabrics
Always start with the manufacturer's recommendations for your specific transfer material. However, here are some general ranges:
| Material / Transfer Type | Common Temp Range (°F) | Common Temp Range (°C) | Notes |
|---|---|---|---|
| Standard HTV on Cotton | 305-320°F | 150-160°C | A very common application. |
| Standard HTV on Polyester | 270-300°F | 130-150°C | Lower temp helps prevent scorching polyester or dye migration. |
| Standard HTV on Blends | 280-310°F | 135-155°C | Always best to test blends. |
| Glitter/Specialty HTV | 320-330°F | 160-165°C | Often needs a bit more heat and pressure. |
| Sublimation (on Polyester) | 380-400°F | 195-205°C | Requires high heat for the ink to gasify and bond with polyester fibers. |
| Screen Printed Transfers | 325-375°F | 160-190°C | Varies widely by ink type, always check the supplier's sheet. |
Calibrating Your Heat Press
It's a good idea to check your heat press's actual platen temperature sometimes. You can use an infrared heat gun or heat strips. Sometimes the display temperature might not be perfectly accurate across the whole platen. For consistent, high-quality results like we demand at Vissafety, an accurate and even temperature is non-negotiable.
What to put between shirt and heat press?
Wondering if you need a barrier between your shirt and the hot press? Worried about damaging your shirt or the machine? Yes, a protective layer is vital.
You should always place a protective sheet, like a Teflon sheet or parchment paper, between the shirt (with the transfer on it) and the heat press's upper platen. This prevents sticking and scorching.

Using a protective sheet is a simple step that makes a big difference in the quality of your heat-pressed shirts and the longevity of your equipment. I always insist on this in our Vissafety production lines; it's a fundamental part of our quality control for applying heat-transfer elements.
The Role of a Protective Sheet
A protective sheet serves several important functions:
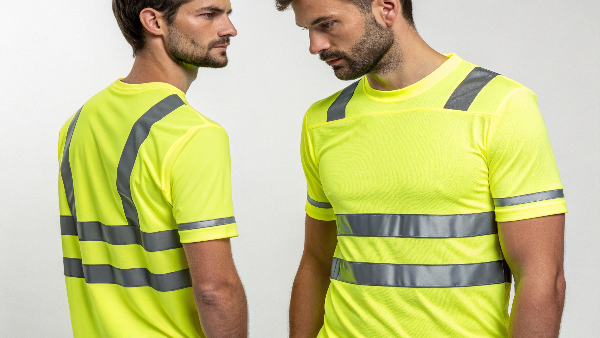
- Protects the Garment: It shields the shirt fabric from direct contact with the extremely hot platen, reducing the risk of scorching or leaving a "shine" on heat-sensitive fabrics like polyester. This is especially important for the performance fabrics we often use in safety wear.
- Protects the Heat Platen: Inks from sublimation, adhesives from HTV, or dyes from fabrics can sometimes transfer onto the upper platen of your heat press. A protective sheet prevents this buildup, keeping your platen clean and ensuring that residue doesn't transfer to subsequent projects.
- Ensures Even Heat Distribution: While minor, it can help slightly diffuse the heat for a more even application.
- Prevents Sticking: Some transfer materials or inks can become sticky when hot. The sheet prevents them from adhering to the platen.
Types of Protective Sheets
There are a few common options:
- Teflon Sheet (PTFE Sheet): This is the most popular choice. Teflon sheets are non-stick, reusable, and durable. They can withstand high temperatures and are easy to wipe clean. We use these extensively at Vissafety. They last a long time if cared for.
- Parchment Paper: Food-grade parchment paper (not waxed paper!) can also be used. It's a more budget-friendly option and is often preferred by some for certain types of HTV as it can leave a slightly more matte finish. It's generally considered single-use or for a few uses.
- Silicone Release Paper: Some transfers come with their own silicone-treated release paper that can sometimes be reused as a protective sheet.
When and How to Use Them
Always use a protective sheet when:
- Pressing any type of heat transfer vinyl (HTV).
- Doing sublimation.
- Using screen printed transfers.
- Pre-pressing a shirt to remove moisture can also benefit from a sheet, especially on delicate fabrics.
Simply place the sheet directly on top of your transfer (which is already positioned on your shirt) before you close the heat press. Ensure the sheet is large enough to cover the entire design area and extends slightly beyond it. This little habit will save you a lot of trouble.
What happens if you heat press too long?
Concerned about the effects of over-pressing? Can leaving the heat press on too long ruin your project? Yes, several problems can occur.
If you heat press too long, the adhesive can ooze out, vinyl may melt or warp, colors can dull, and the fabric might scorch. The transfer can also become too stiff and embedded.
Accuracy in heat pressing isn't just about temperature; it's also critically about time. At Vissafety, our heat-applied reflective materials and logos are engineered for specific application parameters. Over-pressing can compromise their integrity and visibility, which is unacceptable for safety products.
Visible Signs of Over-Pressing
You can often see the results of too much press time:
- Adhesive Ooze: For HTV, you might see a shiny or clear outline of adhesive that has squeezed out from under the edges of the vinyl.
- Melted or Warped Vinyl: The vinyl itself can look distorted, too thin, or even have a bubbly or melted appearance. This is especially true for thinner vinyls.
- Dull or Discolored Transfers: Some inks or vinyl colors can change or lose vibrancy if exposed to heat for too long.
- Fabric Scorching or Shine: The shirt material itself can get damaged. Light-colored fabrics might yellow or brown (scorch). Polyester fabrics can develop a permanent shine or press marks from the platen edges.
- "Ghosting" or Dye Migration: On polyester garments, especially with sublimation or certain HTVs, over-pressing can cause the dye from the fabric to migrate into the transfer, discoloring it.
Impact on Transfer Quality
Beyond just looks, over-pressing affects performance:
- Reduced Durability: Ironically, while you might think more time means better adhesion, excessive heat can break down the adhesive, leading to the design cracking or peeling much sooner than it should. This is a major concern for us, as our Vissafety products must withstand rigorous use and washing.
- Stiff Feel: The transfer can become overly embedded into the fabric fibers, making the design feel stiff and less comfortable to wear.
How to Avoid It
Preventing over-pressing is straightforward:
- Follow Instructions: Always adhere to the time recommendations provided by the manufacturer of your heat transfer material.
- Use an Accurate Timer: Rely on your heat press's timer or a separate, accurate timer. Don't guess.
- Test Press: If you're unsure or using new materials/garments, do a test press on a scrap piece first. Adjust time in small increments (1-2 seconds) if needed.
- Consider Pressure: Extremely high pressure combined with borderline excessive time can also exacerbate problems.
Precision is key for longevity and quality.
What is the best size heat press for T shirts?
Choosing your first heat press, or upgrading, and wondering about size? Worried you'll get one that's too small for your needs or unnecessarily large? It really depends on your projects.
For T-shirts, a 15-inch by 15-inch (38x38cm) heat press is a very popular and versatile size. It can handle most adult T-shirt designs effectively. Smaller presses are good for hobbyists or small designs.
Selecting the right size heat press is an important decision. It impacts your workflow, the types of projects you can tackle, and your budget. At Vissafety, we use various press sizes to accommodate everything from small logos to large reflective panels on our safety apparel.
Common Heat Press Sizes and Their Uses
Heat presses come in a range of platen sizes:
- Small Presses (e.g., 9"x12", 10"x12"):
- Pros: More affordable, take up less space, good for beginners or hobbyists.
- Uses: Ideal for children's clothing, baby onesies, sleeves, chest logos, labels, and smaller designs. You can do larger designs by pressing in sections, but it's trickier to align.
- Medium Presses (e.g., 15"x15", 16"x20"):
- Pros: The most versatile and popular sizes. Balance of capability and footprint.
- Uses: Excellent for most adult T-shirts (S to XL, even XXL often), hoodies, tote bags, and general apparel. A 15"x15" can handle designs up to about 14"x14" in one go. The 16"x20" offers a bit more room for slightly larger or off-center placements. This is the workhorse size for many of our standard Vissafety logo and tape applications.
- Large Presses (e.g., 16"x24", 20"x25" and up):
- Pros: Can handle oversized prints, all-over designs, and larger items.
- Uses: Best for jumbo prints on T-shirts, applying to larger garments like XL/XXL hoodies or jackets without repositioning, sports jerseys with large names/numbers, towels, or small signage. These are more specialized and require more space and budget.
Factors to Consider When Choosing
- Typical Project Size: What's the largest design you plan to press regularly?
- Garment Types: Are you primarily doing T-shirts, or also larger items like hoodies or smaller items like baby clothes?
- Workspace: How much dedicated space do you have for the press? Larger presses need more room, especially swing-away models.
- Budget: Larger presses are more expensive.
- Production Volume: For high volume, a press that fits your most common design size without needing multiple presses can improve efficiency.
For most people starting out or running a small to medium T-shirt business, a 15"x15" press is often the sweet spot. It provides great versatility for the most common T-shirt jobs.
How long do you heat press vinyl on a T shirt?
Specifically wondering about pressing times for vinyl on T-shirts? With different vinyl types, it can be confusing! The time really depends on the vinyl.
Most standard heat transfer vinyl (HTV) requires a press time of 10-15 seconds. Specialty vinyls, such as glitter or flock, might need 15-20 seconds. Always consult the manufacturer's guide for exact times.
When we're applying heat transfer vinyl (HTV) at Vissafety, whether it's for custom branding or specific design elements on our safety gear, the pressing time is a critical variable we control precisely. It ensures the vinyl adheres properly and lasts through tough conditions, which is essential for our products.
Standard HTV vs. Specialty HTV
Not all vinyl is created equal, and this impacts press time:
- Standard HTV (e.g., Siser EasyWeed, Stahls' Fashion-FILM): This is your everyday smooth vinyl. It generally has a shorter press time, often in the 10-15 second range. The exact time can vary slightly by brand and even color within a brand.
- Specialty HTV: This category includes a wide variety:
- Glitter HTV: Usually requires a bit more time (15-20 seconds) and often firmer pressure to embed the glitter flakes properly.
- Flock HTV: This gives a raised, fuzzy, suede-like feel. It might also need 15-20 seconds.
- Holographic/Metallic HTV: Times can vary, but they often fall in the 10-15 second range, similar to standard HTV. However, their peel instructions (hot, warm, cold) can be very specific.
- Stretch HTV: Designed for stretchy fabrics, these often have specific time/temp requirements to maintain elasticity.
The Importance of Manufacturer Instructions
I can't stress this enough: always refer to the instructions provided by the vinyl manufacturer. Reputable brands will provide datasheets or guides specifying the recommended temperature, time, pressure, and peel type (hot, warm, or cold) for each of their vinyl products. These are your most reliable source of information. At Vissafety, we exclusively use materials where these specifications are clear because consistent quality application of reflective tapes and logos is paramount. Using the wrong time can lead to adhesion failure.
Peel Type and Its Relation to Time
The peel type (when you remove the clear carrier sheet) also influences how you manage time:
- Hot Peel: You remove the carrier sheet immediately after opening the press.
- Warm Peel: You wait a few seconds for it to cool slightly.
- Cold Peel: You wait until the vinyl and garment are completely cool to the touch.
While not directly the "press time," ensuring the vinyl has been pressed for the correct duration is vital for the adhesive to set properly, allowing for a clean peel according to its type. Rushing a cold peel or letting a hot peel cool too much can ruin the application.
Always test on a scrap piece if you are unsure or trying a new vinyl.
Conclusion
Heat pressing shirts is quite manageable. Just follow the correct time, temperature, and material guidelines. This ensures you get great, durable custom apparel every time.
-
Explore this link to discover expert tips and techniques for achieving flawless heat press results on shirts. ↩
-
Find out how a Teflon sheet can protect your designs and enhance the heat pressing process. ↩
-
Explore this link to find the best heat press machines tailored for beginners, ensuring you make a smart investment. ↩
-
Learn about the significance of using a protective sheet in heat pressing to ensure quality and prevent damage. ↩
-
Explore this resource to master the art of using HTV, ensuring perfect application and durability for your designs. ↩
-
Understanding press time is crucial for quality results; this link will provide insights into optimizing your heat press techniques. ↩