Struggling to get logos or reflective designs to stick properly on safety vests? It's frustrating when heat transfers peel off after just a few washes. We can help.
Successfully heat pressing a safety vest involves using the right settings for polyester fabric. Pre-press the vest to remove moisture, position your transfer, use a heat press set to around 300-320°F (150-160°C) with medium pressure for 10-15 seconds, and use a protective cover sheet.
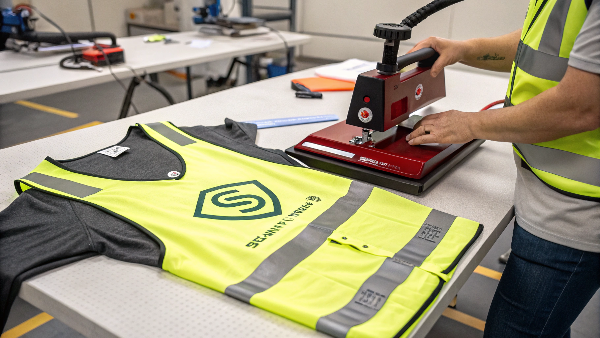
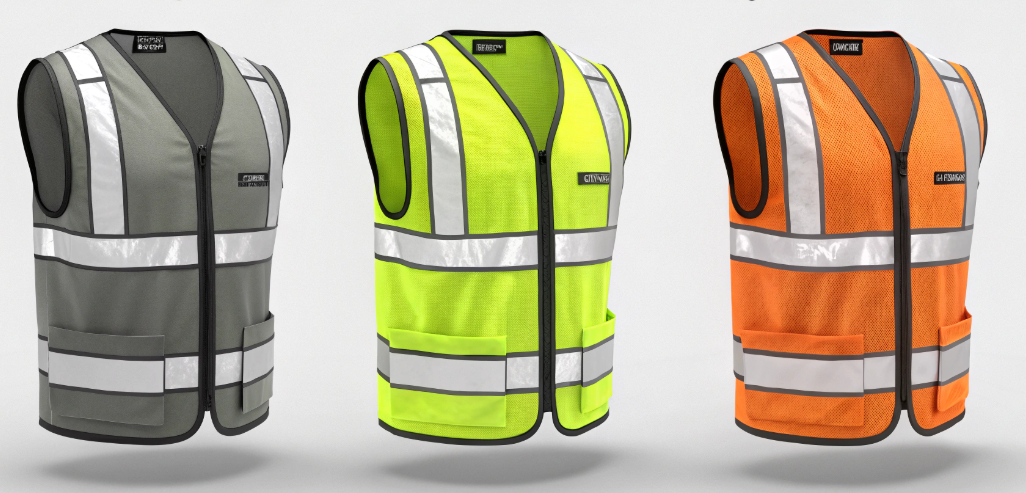
Getting heat transfers right, especially on workwear like safety vests, is crucial. These garments face tough conditions and need to maintain their integrity and compliance. As a manufacturer, Vissafetywear understands the materials and processes involved. We often customize vests for clients like Danny Cheng, who relies on us for durable, compliant apparel. Let's dive into the specifics of how to heat press these items correctly, ensuring your designs last and the vest remains effective. Follow these steps, and you'll avoid common pitfalls and achieve professional, long-lasting results.
How do you protect fabric from heat press damage?
Worried about scorching or melting delicate safety vest fabric? High heat can easily damage polyester if you're not careful, leaving permanent marks. Protect your investment.
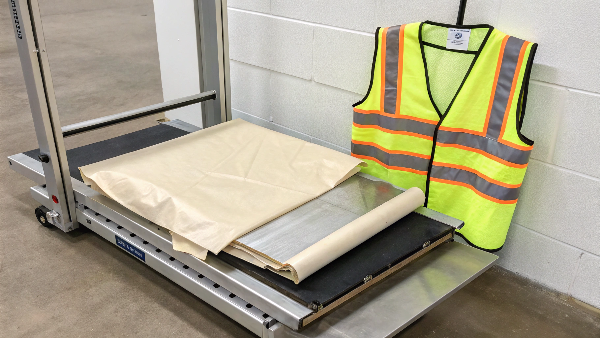
Use a protective cover sheet1 between the heat platen and the safety vest. Teflon sheets or parchment paper act as a barrier, distributing heat evenly and preventing direct contact that causes scorching or melting.
Safety vests are usually made from polyester fabrics2. While durable, polyester can scorch or even melt under excessive, direct heat. A cover sheet is essential. Think of it as an insurance policy for the garment.
Understanding Fabric Sensitivity
Polyester has a lower melting point compared to natural fibers like cotton. Direct contact with a hot platen (the heated upper part of your press) can quickly lead to:
- Scorching: Brownish marks on the fabric.
- Shining: The fabric develops an unnatural sheen where the press contacted it.
- Melting: In severe cases, the fibers can actually melt.
Types of Cover Sheets
Using the right barrier is key. Here are common options:
| Cover Sheet Type | Pros | Cons | Best For |
|---|---|---|---|
| Teflon Sheet | Reusable, durable, smooth surface | More expensive initially | Frequent use, smooth vinyl finishes |
| Parchment Paper | Inexpensive, readily available | Single-use or limited re-use | Budget-conscious use, general applications |
| Silicone Paper | Non-stick, often included with vinyl | Can be less durable than Teflon | Specific vinyl types requiring its release properties |
From my experience at Vissafetywear, ensuring the heat application doesn't compromise the fabric is just as important as ensuring the transfer adheres properly. We always use protective measures during our customization processes. A simple sheet makes a huge difference in preventing damage and achieving a professional finish.
What temperature do you heat press reflective vinyl3?
Applying reflective tape or logos? Using the wrong temperature for reflective heat transfer vinyl (HTV)4 can ruin its visibility or cause it to fall off. Get it right.
Heat press reflective HTV typically between 300-320°F (150-160°C). However, always check the specific manufacturer's instructions5, as settings can vary slightly between different types and brands of reflective material.
Reflective vinyl is crucial for safety vest compliance (like ANSI/ISEA 107 or EN ISO 20471 standards). It contains tiny glass beads or prismatic elements that reflect light. Applying it correctly ensures it adheres well and maintains its reflective properties. Temperature is a critical factor in this process.
Why Temperature Matters for Reflectivity
- Too Low: The adhesive won't activate properly, leading to poor adhesion. The vinyl might peel off easily, especially after washing.
- Too High: Excessive heat can damage the reflective elements (glass beads/prisms), reducing the material's ability to reflect light. It can also damage the adhesive or even the polyester vest fabric itself.
Finding the Sweet Spot
While 300-320°F (150-160°C) is a common range, slight variations exist. Consider these factors:
| Factor | Consideration | Action |
|---|---|---|
| Manufacturer Specs | Each brand (e.g., 3M Scotchlite, Vissafety custom tapes) has precise settings. | Always prioritize the manufacturer's guide. |
| Vinyl Type | Standard vs. segmented vs. flame-resistant reflective tapes may differ. | Check specs for the specific type you use. |
| Fabric Type | Polyester vests are standard, but blends might react differently. | Test on a scrap piece if unsure. |
| Heat Press | Ensure your press provides accurate and even temperature. | Calibrate or test your press regularly. |
At Vissafetywear, we rigorously test our reflective materials and application processes to guarantee compliance and durability for clients like Danny, who need reliable, high-visibility gear. Always test your settings on a small, inconspicuous area or a scrap piece first.
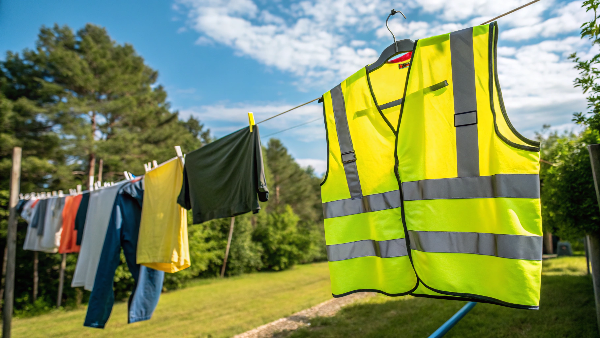
Can I put a safety vest in the dryer?
Wondering if you can just toss a safety vest in the dryer after washing? This common shortcut can actually damage the vest and reduce its effectiveness. Be careful.
No, you should generally avoid putting safety vests in an automatic dryer. The high heat can damage or melt the reflective tape and potentially harm the polyester fabric itself. Air drying is recommended.
While convenient, machine drying poses significant risks to safety vests, especially those meeting standards like ANSI/ISEA 107. The components designed to keep workers safe are sensitive to heat.
Heat's Impact on Vest Components
- Reflective Tape: Most reflective tapes use heat-sensitive adhesives and reflective elements (like glass beads). High dryer heat can:
- Weaken the adhesive bond, causing tapes to peel or crack.
- Damage the reflective elements, reducing visibility, especially at night. This can make the vest non-compliant.
- Cause tapes applied via heat press (like logos or custom designs) to detach.
- Polyester Fabric: High heat can cause polyester to:
- Shrink slightly.
- Develop a permanent sheen or even melt in extreme cases.
- Weaken over time, reducing the garment's lifespan.
Proper Care for Longevity
To maintain your safety vest's integrity and compliance:
- Wash Correctly: Use cold or cool water on a gentle cycle. Avoid harsh detergents or bleach.
- Air Dry: Hang the vest up to dry away from direct sunlight or heat sources. It usually dries quickly due to the polyester material.
- Check Labels: Always refer to the care label sewn into the vest. Manufacturers like Vissafetywear provide specific instructions based on the materials used.
I remember talking with Danny Cheng about vest longevity. He emphasized how crucial proper care is for his clients in construction and logistics, as replacing vests frequently due to damage is costly. Proper washing and air drying significantly extend the life and effectiveness of the garment.
How do you heat press reflective vinyl?
Need to apply reflective designs or tapes accurately? The process for reflective HTV needs care to ensure it sticks well and keeps its reflective quality. Let's clarify.
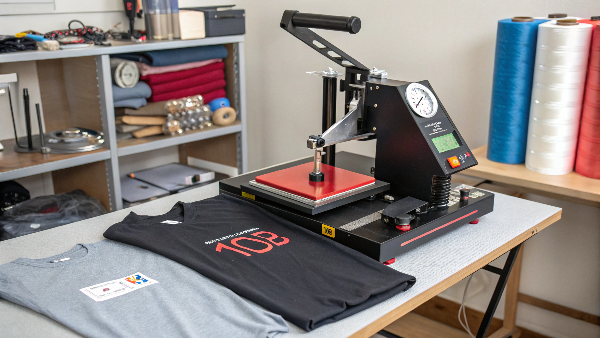
Heat press reflective vinyl by pre-pressing the vest, positioning the vinyl, covering it (Teflon/parchment), pressing at ~300-320°F (150-160°C) for 10-15 secs with medium pressure. Follow manufacturer instructions for peeling (hot/cold).
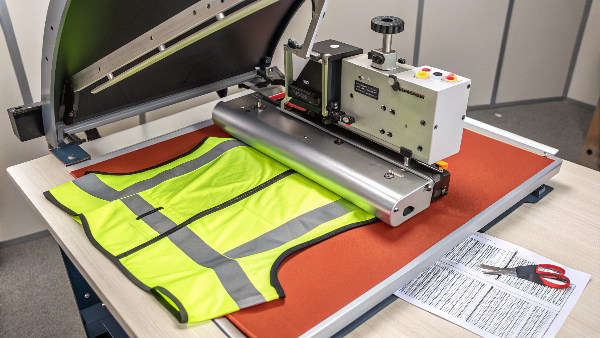
Applying reflective vinyl involves more than just heat. Precision in each step ensures the vinyl adheres correctly, looks professional, and functions as intended for safety compliance. Here’s a breakdown of the process we follow at Vissafetywear for consistent results.
Step-by-Step Application
- Prepare Your Design: Cut your reflective HTV design using a plotter/cutter. Carefully "weed" away the excess vinyl, leaving only your design on the sticky carrier sheet.
- Prepare the Vest: Place the safety vest flat on your heat press's lower platen. Pre-press the area where you'll apply the vinyl for 3-5 seconds. This removes moisture and wrinkles, ensuring a good surface for adhesion.
- Position the Vinyl: Carefully place the weeded design (still on its carrier sheet) onto the desired spot on the vest. The sticky side of the carrier holds it in place. Ensure correct alignment.
- Cover It: Place a protective cover sheet (Teflon or parchment paper) over the entire design and carrier sheet. This prevents direct contact with the heat platen.
- Press: Close the heat press using the manufacturer's recommended settings. For typical reflective vinyl:
- Temperature: 300-320°F (150-160°C)
- Time: 10-15 seconds
- Pressure: Medium
- Peel: Open the press. Check the manufacturer's instructions to see if you should peel the carrier sheet off while it's still hot (hot peel) or wait until it cools down (cold peel). Peeling at the wrong time can ruin the application. Peel slowly and evenly.
- (Optional) Post-Press: Some recommend a brief 2-3 second press directly over the applied vinyl (with cover sheet) after removing the carrier sheet to further secure the bond.
Accuracy matters. Misalignment or incorrect settings can lead to peeling or reduced reflectivity, failing safety standards. We always double-check settings and alignment for every custom order.
Can you iron directly on heat transfer vinyl?
Thinking of using a regular household iron directly on HTV? It seems quick, but direct contact between a hot iron and vinyl is a recipe for disaster. Avoid this.
No, you should never iron directly on heat transfer vinyl (HTV). The iron's concentrated heat will melt the vinyl instantly, ruining your design, the garment, and potentially your iron.
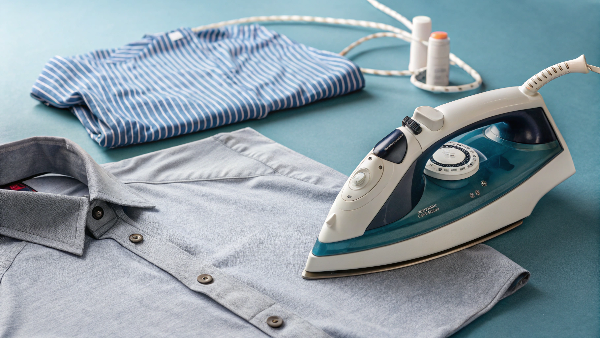
While you can sometimes apply HTV using a household iron (though a heat press is far better), ironing over already applied vinyl requires extreme caution, and direct contact is forbidden.
Why Direct Ironing Damages HTV
- Melting Point: HTV is designed to melt slightly under controlled heat and pressure to bond with fabric. An iron provides intense, uncontrolled, direct heat far exceeding what the vinyl can tolerate.
- Sticking: The melted vinyl will immediately stick to the hot surface of the iron, creating a mess that's hard to clean and potentially damaging the iron's soleplate.
- Design Ruin: The part of the design touched by the iron will become a melted blob, permanently ruining the appearance.
Safe Alternatives (If You Must Use an Iron)
If you absolutely need to iron a garment with HTV already applied (e.g., to remove wrinkles elsewhere):
- Use a Cover Sheet: ALWAYS place a protective layer like parchment paper or a Teflon sheet over the HTV design before ironing near or over it. This barrier prevents direct contact.
- Iron from the Inside: Turn the garment inside out. Iron the fabric from the back side, avoiding prolonged heat over the HTV area. Use the lowest heat setting possible for the fabric.
- Avoid the Design: The safest option is simply to iron around the HTV design, keeping the iron well away from it.
A heat press provides even temperature and pressure, which is why it's the standard for professional results. We rely on precise heat press technology at Vissafetywear for all our HTV applications, ensuring durability without damaging the material.
Why is my vinyl peeling off my shirt (or vest)?
Frustrated by HTV designs peeling off vests after application or washing? This common problem usually points to issues in the application process or material incompatibility. Let's troubleshoot.
Vinyl peeling is often caused by incorrect heat press settings (temperature, time, pressure), inadequate fabric preparation (not pre-pressing), fabric coatings, or improper washing and drying.

Seeing your carefully applied design lift or peel away is disheartening. As manufacturers dealing with bulk orders and demanding clients like Danny Cheng, we ensure our applications are durable. Peeling issues usually stem from a few key areas.
Common Causes of HTV Peeling
Understanding the root cause helps prevent it from happening again.
| Potential Problem | Likely Cause | Solution |
|---|---|---|
| Temperature | Too low (adhesive didn't activate) or too high (adhesive burned/damaged). | Use manufacturer's recommended temperature. Test your heat press accuracy. |
| Pressure | Too light (insufficient bond) or too heavy (adhesive squeezed out). | Use manufacturer's recommended pressure (light, medium, firm). Ensure even pressure. |
| Time | Too short (incomplete bond) or too long (adhesive damaged). | Use manufacturer's recommended time precisely. |
| Fabric Preparation | Moisture or wrinkles in the fabric prevent good contact. | Always pre-press the garment for 3-5 seconds to remove moisture and smooth the area. |
| Fabric Type/Coating | Some fabrics (nylon, heavily treated polyester) resist adhesion. Coatings repel HTV. | Check HTV compatibility with the fabric. Avoid pressing on waterproof/resistant coatings. Test first. |
| Improper Peeling | Peeling the carrier sheet hot when it requires a cold peel, or vice versa. | Follow manufacturer's specific peel instructions (hot/cold). |
| Washing/Drying | Washing too soon (wait 24hrs), using hot water, bleach, or machine drying. | Follow care instructions: wait 24hrs, wash cold, gentle cycle, no bleach, air dry. |
| Vinyl Quality/Age | Old, expired, or low-quality HTV may have degraded adhesive. | Use fresh, reputable HTV. Store vinyl correctly. |
At Vissafetywear, our triple-check quality control minimizes these issues in production. For DIY or smaller operations, carefully following each step and using the correct specs is vital for durable results.
Can I use parchment paper for a heat press?
Looking for a protective layer for your heat press? If you don't have a Teflon sheet, you might wonder if parchment paper from your kitchen will work. Yes, it can.
Yes, you can use parchment paper as a cover sheet in a heat press. It provides a non-stick barrier, protecting your garment from direct heat and preventing ink or vinyl transfer to the platen.
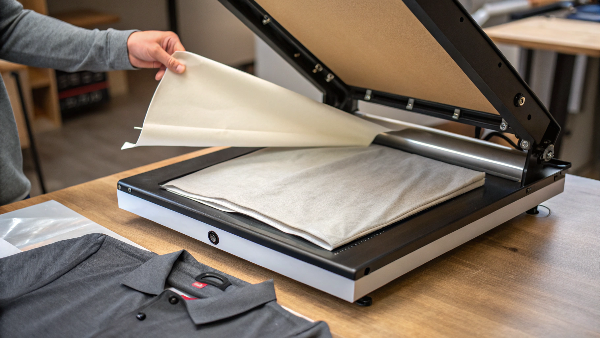
Using a cover sheet is essential when heat pressing, especially on sensitive fabrics like the polyester used in safety vests or when working with certain types of transfers. Parchment paper is a readily available and effective option.
Parchment Paper vs. Teflon Sheets
Both serve a similar purpose, but have differences:
- Parchment Paper:
- Pros: Inexpensive, widely available, good non-stick properties, disposable.
- Cons: Less durable (often single-use or limited re-use), can sometimes retain slight moisture, may brown slightly over time with high heat.
- Important: Use plain, uncoated baking parchment paper. Do not use wax paper, as the wax will melt onto your garment and press.
- Teflon Sheet:
- Pros: Highly durable, reusable many times, excellent non-stick surface, smooth finish.
- Cons: Higher initial cost.
When to Use Parchment Paper
Parchment paper is great for:
- Protecting the upper platen from inks (sublimation) or stray adhesive.
- Protecting the garment from direct heat, preventing scorching or shine marks.
- Acting as a barrier between layers if pressing multi-layer designs.
- Budget-conscious operations or infrequent pressing tasks.
We use durable Teflon sheets in our Vissafetywear factory due to the high volume, but for occasional use or as a backup, parchment paper works perfectly well. Just ensure it lies flat and covers the entire design area during pressing. It's a simple tool that prevents costly mistakes.
How many seconds do you press heat transfer vinyl?
Confused about how long to press HTV? Pressing time is crucial – too short and it won't stick, too long and you risk damage. Find the right duration.
Most standard heat transfer vinyl requires pressing for 10-15 seconds. However, this duration varies significantly depending on the specific type of HTV and the manufacturer's instructions.
Getting the timing right is as important as temperature and pressure for a successful HTV application. The heat needs enough time to fully activate the adhesive and bond it to the fabric fibers.
Factors Influencing Press Time
There's no single answer because several factors affect the ideal duration:
- Type of HTV: Different vinyls have different formulations.
- Standard/Basic: Often 10-15 seconds.
- Glitter: May require 15-20 seconds.
- Flock: Can need 15-20 seconds.
- Reflective: Typically 10-15 seconds.
- Specialty (Holographic, Metallic): Varies greatly, check specs carefully.
- Manufacturer: Brands use unique chemistries. Always prioritize their specific recommendations over general guidelines. A Siser EasyWeed might differ from a Vissafety custom vinyl.
- Temperature & Pressure: These settings work together with time. Using a slightly lower temperature might require a slightly longer press time, and vice versa (within recommended ranges).
- Fabric Type: While polyester vests are common, pressing on cotton or blends might have slightly different optimal times.
- Layering: When applying multiple layers of HTV, each layer usually requires a shorter press time (e.g., 2-5 seconds), with a final full press at the end.
Why Precise Timing Matters
- Too Short: Incomplete adhesive activation = poor bond, peeling later.
- Too Long: Can burn the adhesive, damage the vinyl (especially specialty types), potentially scorch the fabric, or cause difficulty when peeling the carrier sheet.
Always consult the documentation that came with your specific HTV. We provide detailed spec sheets for our custom materials to clients like Danny Cheng to ensure they achieve optimal results every time. If in doubt, do a test press.
What temperature do you press holographic vinyl?
Want to add eye-catching holographic designs? Holographic HTV is sensitive, and using the wrong temperature can dull its unique effect or cause adhesion issues. Get the settings right.
Press holographic heat transfer vinyl typically around 300-320°F (150-160°C). As with all specialty vinyls, it's crucial to check and follow the specific manufacturer's guidelines precisely.
Holographic HTV creates stunning, shifting rainbow effects, but its special finish makes it more sensitive to heat than standard vinyl. Applying it correctly preserves that unique look and ensures it lasts.
Key Considerations for Holographic HTV
- Temperature Sensitivity: While the 300-320°F (150-160°C) range is common, overheating is a major risk. Too much heat can flatten or dull the holographic effect permanently. Stick closely to the recommended temperature.
- Pressure: Usually requires medium pressure. Too much pressure can also diminish the holographic finish.
- Time: Pressing time is often similar to standard HTV (around 10-15 seconds), but verify this with the manufacturer's instructions. Over-pressing time-wise can also damage the effect.
- Peeling: Holographic HTV is almost always a cold peel. This is critical. Peeling the carrier sheet while the vinyl is still hot will likely stretch or tear the vinyl and ruin the application. Let it cool completely before removing the carrier.
- Layering: Holographic HTV should generally be the top layer in multi-layer designs. It doesn't typically work well as a base layer.
- Testing: Given its sensitivity, always perform a test press on scrap fabric or an inconspicuous area before applying to your final safety vest.
At Vissafetywear, while our core focus is safety compliance, we understand the demand for customization and unique aesthetics. When working with specialty vinyls like holographic for custom client requests, rigorous adherence to manufacturer specifications is key to achieving both visual appeal and durability.
Conclusion
Properly heat pressing safety vests requires attention to fabric type, vinyl specifications, and correct settings. Always use a cover sheet, follow manufacturer guidelines for temperature, time, and pressure, and prioritize air drying.
-
Explore this link to understand how protective cover sheets can save your fabric from heat damage and ensure quality results. ↩
-
Learn about polyester fabrics and their heat sensitivity to better protect your garments during heat pressing. ↩
-
Learn about the benefits of reflective vinyl, including its safety features and applications in various industries. ↩
-
Explore this link to understand the properties and applications of reflective HTV, ensuring you use it effectively for safety gear. ↩
-
Discover the significance of following manufacturer's instructions to ensure optimal results and safety when using heat transfer vinyl. ↩